Click Node
Browser NodeClick on elements in a web page using CSS selectors or Playwright locators
Overview
The Click node allows you to simulate mouse clicks on web page elements. It supports multiple selector types and includes automatic fallback functionality to improve reliability.
Configuration
The Click node has two sections: primary fields (always visible) for common settings, and Advanced Options (collapsed by default) for less common settings. Click "Advanced Options" to expand them.
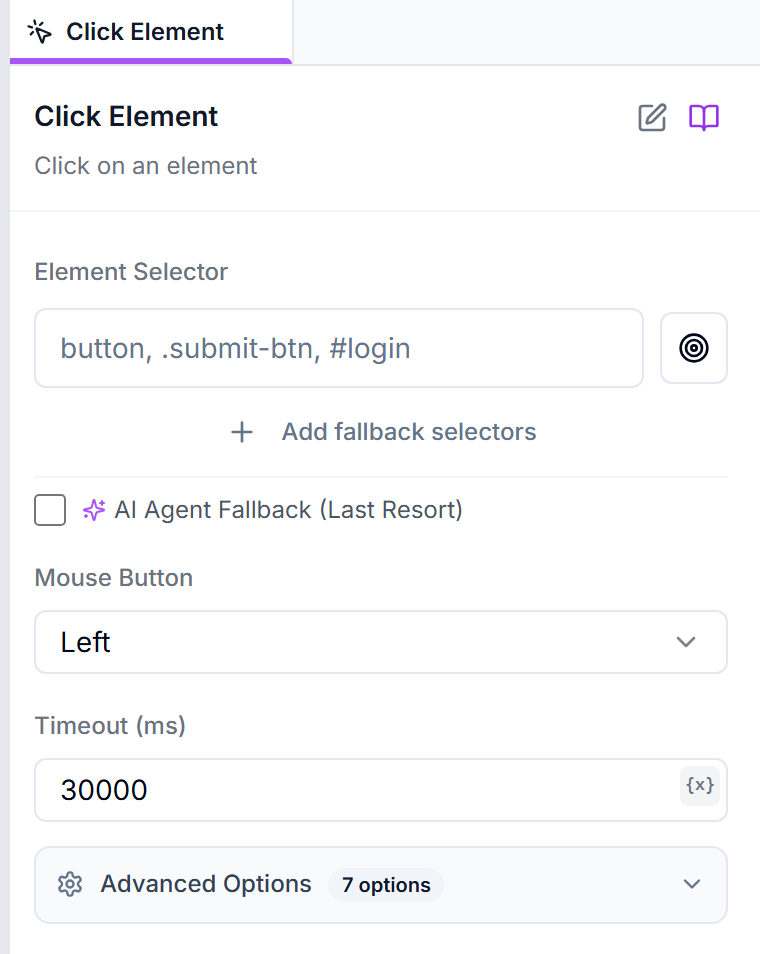
Element SelectorThe element you want to click. Use the crosshair button to pick an element visually, or enter a CSS selector manually. You can also add multiple fallback selectors by clicking 'Add fallback selectors'.
button.submit, #login-btn, [data-testid='submit']Mouse ButtonWhich mouse button to use for the click action. Options: Left, Right, Middle, or Coordinates (for pixel-based clicking).
LeftTimeout (ms)Maximum time in milliseconds to wait for the element to be clickable before failing.
30000Advanced Options
Collapsed by Default
ModifiersHold a modifier key while clicking. Options: None, Shift, Control, Alt, Meta (Cmd/Win), or Control or Meta.
NoneClick CountHow many times to click. Use 1 for a single click, 2 for a double-click.
1Delay Between Clicks (ms)Time in milliseconds to wait between pressing and releasing the mouse button. Useful for drag-like interactions.
0Force Click (bypass actionability checks)When enabled, bypasses visibility and actionability checks. Use only when the element is valid but hidden or obstructed.
DisabledTrial Run (no actual click)When enabled, performs all the positioning and checks without actually clicking. Useful for testing selectors.
DisabledPosition X / Position Y (within element)Optional offset in pixels from the element's top-left corner, to click a specific point inside it.
10Selector Options
The Click node supports multiple selector formats. When you record actions using the AI Browser or Visual Builder recorder, multiple selector options are automatically generated and prioritized for reliability.
CSS Selectors
button.submit, #login-btn, .nav-item:first-childPlaywright Locators
getByRole("button", {name: "Submit"})getByText("Click here")XPath (converted internally)
//button[@class="submit"]Custom Multi-Selector Support
You can add multiple selectors with fallback support, even without using the Selector Picker. This gives you full control over the fallback order.
Step 1: Click "Add fallback selectors"
Below the selector input field, click the "Add fallback selectors" button to enter multi-selector mode.
Step 2: Enter Your Selectors
Type each selector and press Enter or click the + button. Add as many fallback selectors as you need.
Step 3: Drag to Reorder
Drag selectors using the grip handle to change their fallback priority. The selector at position 1 is tried first, then position 2, and so on.
Step 4: Edit or Delete
Use the edit button to modify any selector, or the X button to remove it.
Pro Tip
Auto-Fallback Feature
Automatic Fallback
When you record a click action, the system generates multiple selector options:
- Primary selector (highest priority, most specific)
- Alternative CSS selectors (using different attributes)
- Playwright role-based selectors
- Text-based selectors
- Fallback selectors (more generic, lower priority)
Examples
button[type="submit"].file-itemgetByRole("cell", {name: "Title"})Best Practices
Tip: Use Specific Selectors
Tip: Enable Auto-Fallback
Warning: Avoid Force Clicking
Troubleshooting
Element Not Found
The selector doesn't match any element on the page.
- Check that the page has fully loaded before clicking
- Add a Wait node before the Click node
- Verify the selector using browser DevTools
- Enable auto-fallback for alternative selectors
Element Not Clickable
The element is hidden, disabled, or obscured by another element.
- Wait for animations to complete
- Scroll the element into view first
- Check if the element is behind a modal or overlay
- Use force: true only as a last resort