PrompteryxBeta
    ⌘K
    PlatformSupport
    Menu
    IntroductionInstall Desktop & extensionQuick StartPlatform Overview
    OverviewWhat you can makeAI Browser Agent in the chatModels and AutoConnectorsSchedulesProjectsExplore and publishingShare linksMemory and SkillsPersonal agent (beta)Welcome, settings and skinsPlans, credits and top-upsPrompteryx DesktopGroups (pilot)Phone app (early access)
    OverviewCreating WorkflowsTesting & DebuggingScheduling
    OverviewGetting StartedCommandsRecordingSettingsStructured OutputParallel AgentsTips & Best Practices
    OverviewInstallationSidebar AgentUsing Attached FilesExecute on Current TabExporting to Visual Studio
    Overview
    OverviewOpen PageClickClick CoordinatesFillExtract TextScreenshotWaitPress KeyFocus ElementBlur ElementSelect TextHighlight ElementSet ViewportGet Bounding BoxScrollHoverSelect OptionAssertionsCookiesEvaluate JavaScriptExample Workflows
    OverviewPrompteryx Browser AgentOpenAI
    OverviewSchedule TriggerWebhook Trigger
    OverviewGoogle SheetsGoogle CalendarConnect Hub (3,000+ apps)Example Workflows
    AI Vision SettingsChrome Automation ProfilesCloud BrowserBrowser Profiles & Persistent ContextVideo RecordingExecution LogsSharing & CollaborationEdit History
    Selectors GuideVariables
    Start hereGet an API keyRun the AI browser agentDrive a cloud browserRun workflows from anywhereUse connected apps (Connect Hub)SDK (TypeScript)CLIMCP for AI assistants
    REST APIWebhooksMCP toolsCloud Browser APICloud Browser quickstartMigrate from Browserbasen8nZapierMake.com

    Need help? Contact Support

    1. Documentation
    2. Visual Builder
    3. Creating Workflows

    Creating Workflows

    Visual Studio

    Build automations in the Visual Studio

    Overview

    The Visual Studio is a drag-and-drop workflow builder where you create automations by connecting nodes. Each node represents an action - like clicking a button, filling a form, or sending an email. Connect nodes together to build complete automation workflows.

    Getting Started

    1. Create a New Workflow

    Click New workflow on the My workflows page (or open Visual Studio from the sidebar under Create). Replace "Untitled Workflow" in the name field at the top-left with a descriptive name.

    2. Add a Trigger

    Every workflow starts with a trigger - the event that starts execution:

    • Manual Trigger - Start by clicking "Run Workflow"
    • Schedule Trigger - Run at scheduled times
    • Webhook Trigger - Start from external HTTP requests

    For testing, always use Manual Trigger. Add scheduled triggers when ready for production. If the first node you add isn't a trigger, a Manual Trigger is added for you.

    3. Add Nodes

    Add nodes from the node library on the left:

    1. Search or browse for the node you need
    2. Click to add it to the canvas, or drag and drop
    3. Click the node to configure its parameters
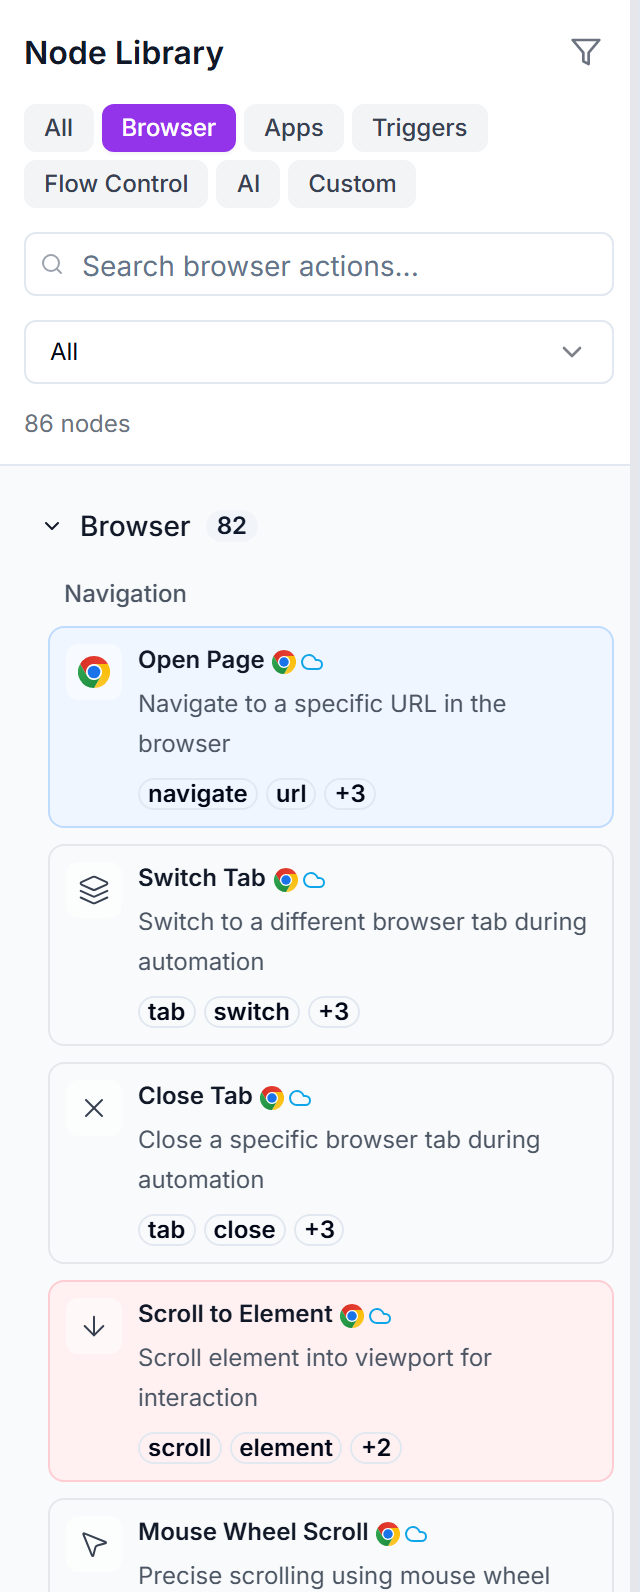
    The Node Library panel with the Browser tab selected, showing searchable action cards like Open Page, Switch Tab and Scroll to Element
    The Node Library — tabs group nodes by kind (Browser, Apps, Triggers, Flow Control, AI); every card can be clicked or dragged onto the canvas.
    4. Connect Nodes

    Connect nodes by dragging from the output handle (right side) of one node to the input handle (left side) of another:

    • Nodes execute in the order they're connected
    • One output can connect to multiple inputs (parallel execution)
    • To remove a connection, right-click it and choose Disconnect (or select it and press Delete)

    Building a Browser Automation

    Browser automations require specific structure:

    1. Start with a Trigger - Add Manual Trigger for testing
    2. Add Open Page - This launches the browser and navigates to your URL
    3. Add Browser Actions - Click, Fill, Extract Text, etc.
    4. Use the Selector Picker - Click the target icon to pick elements from the page
    Every browser workflow must start with an Open Page node. Browser actions won't work without an open browser context.

    Configuring Nodes

    When you click a node, the property panel on the right shows its configuration:

    • Required fields are marked with a red asterisk
    • Selector fields have a target icon to open the Selector Picker
    • Variables can be inserted using {{variableName}} syntax
    • Help icons link to documentation for that node

    Chrome Automation Profiles

    Use Chrome Automation Profiles to run workflows with specific browser sessions:

    • Maintain logged-in sessions across runs
    • Use different profiles for different accounts
    • Keep cookies and local storage between executions

    Choose the profile from the Profile selector in the Visual Studio toolbar — it's saved with the workflow.

    Learn more about Chrome Profiles →

    Saving and Running

    Saving
    Save from the Save menu at the top-left (Save or Save As...). An orange dot next to the workflow name means you have unsaved changes. Undo and redo with Ctrl+Z and Ctrl+Y.
    Run Workflow
    Click the purple "Run Workflow" button in the toolbar to execute. Use Manual Trigger for testing.

    Best Practices

    Start Simple
    Build your workflow step by step. Test after adding each node to catch issues early.
    Use Wait Nodes Sparingly
    Browser actions already wait for the page to load and for their target element to be ready. Add a Wait for Element node only when content loads late, after the page is already interactive.
    Keep Auto-Fallback On
    When a selector field has several options (for example from the Selector Picker), the Auto-fallback checkbox is on by default — if the first selector fails, the next one is tried. This helps handle minor UI changes automatically.

    Related Documentation

    Testing Workflows

    Debug and validate

    Browser Nodes

    All browser actions

    Selectors Guide

    Element selection

    Chrome Profiles

    Browser sessions