PrompteryxBeta
    ⌘K
    PlatformSupport
    Menu
    IntroductionInstall Desktop & extensionQuick StartPlatform Overview
    OverviewWhat you can makeAI Browser Agent in the chatModels and AutoConnectorsSchedulesProjectsExplore and publishingShare linksMemory and SkillsPersonal agent (beta)Welcome, settings and skinsPlans, credits and top-upsPrompteryx DesktopGroups (pilot)Phone app (early access)
    OverviewCreating WorkflowsTesting & DebuggingScheduling
    OverviewGetting StartedCommandsRecordingSettingsStructured OutputParallel AgentsTips & Best Practices
    OverviewInstallationSidebar AgentUsing Attached FilesExecute on Current TabExporting to Visual Studio
    Overview
    OverviewOpen PageClickClick CoordinatesFillExtract TextScreenshotWaitPress KeyFocus ElementBlur ElementSelect TextHighlight ElementSet ViewportGet Bounding BoxScrollHoverSelect OptionAssertionsCookiesEvaluate JavaScriptExample Workflows
    OverviewPrompteryx Browser AgentOpenAI
    OverviewSchedule TriggerWebhook Trigger
    OverviewGoogle SheetsGoogle CalendarConnect Hub (3,000+ apps)Example Workflows
    AI Vision SettingsChrome Automation ProfilesCloud BrowserBrowser Profiles & Persistent ContextVideo RecordingExecution LogsSharing & CollaborationEdit History
    Selectors GuideVariables
    Start hereGet an API keyRun the AI browser agentDrive a cloud browserRun workflows from anywhereUse connected apps (Connect Hub)SDK (TypeScript)CLIMCP for AI assistants
    REST APIWebhooksMCP toolsCloud Browser APICloud Browser quickstartMigrate from Browserbasen8nZapierMake.com

    Need help? Contact Support

    1. Documentation
    2. AI Browser
    3. Recording

    Recording & Exporting Actions

    Export Guide

    Convert AI Browser sessions into reusable Visual Studio workflows

    One of the most powerful features of the AI Browser Agent is the ability to record every action it takes and export them as a Visual Studio workflow. This means you can use AI to figure out the automation once, then run it repeatedly without consuming AI credits.

    How Recording Works

    1

    Automatic Action Capture

    Every action the AI performs (clicks, typing, navigation, scrolling) is automatically recorded with the selectors and parameters it captured.

    2

    Smart Selector Generation

    Each clicked element keeps a ranked list of selector options (Playwright locators such as getByRole, or CSS), so the workflow can fall back to another option if one stops matching.

    3

    One-Click Export

    When ready, click "Refine in Visual Studio" to convert all recorded actions into workflow nodes that you can edit, arrange, and enhance.

    Video Recording

    In addition to action recording, you can enable video recording to capture a complete visual record of the browser session. Video recording is included on paid plans (not the Free Trial).

    To enable video recording:

    1. Toggle "Video Recording" ON in the AI Browser Agent header (or turn on "Enable Video Recording by Default" in Settings β†’ AI Browser Agent)
    2. Run your session as normal
    3. The video is finalized when the session ends β€” End Chat, or the cloud browser's session timeout
    4. Cloud Browser: the chat's recording card shows "Watch recording" once the video is ready, and every recording is listed on the Cloud Sessions page. Your own Chrome: the "Recording saved!" card opens the file, saved to the Recording Location set in Settings β†’ AI Browser Agent

    πŸ’‘ Video recording slightly increases resource usage but doesn't affect AI credits.
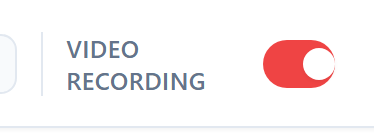
    The Video Recording toggle in the AI Browser Agent header, switched on and showing red
    The Video Recording toggle in the AI Browser Agent header β€” red means the next session records.

    Exporting to Visual Studio

    Step 1: Complete Your Session
    Use the AI Browser Agent to complete the task you want to automate. The agent records every action automatically - no special setup required.
    Step 2: Refine in Visual Studio
    Click "Refine in Visual Studio" in the chat's status bar (its badge shows how many actions were recorded), or expand "See how to re-use this…" on the run's "All done" card and click "Open in Visual Studio". Visual Studio opens with your recorded actions pre-loaded.
    Step 3: Review and Refine
    Visual Studio opens with your actions converted to nodes. Review each node to:
    • Verify selectors are correct
    • Add wait conditions if needed
    • Parameterize values you want to change between runs
    • Add error handling or branching logic
    Step 4: Save and Run
    Save your workflow and run it! Each execution uses the same actions without any AI calls, so it's completely free of AI credit costs.

    Tips for Good Recordings

    Start from a Clean State
    Begin your session from a consistent starting point (e.g., the homepage) so the workflow can be reliably reproduced.
    Use Explicit Waits
    If you tell the AI to "wait for the page to load", that wait gets recorded and helps make your workflow more reliable.
    Avoid Random Data
    If the AI generates random test data, you'll want to parameterize those values in Visual Studio to make them configurable.
    Test on the Same Site Version
    Export and test on the same version of the website. Layout changes may require selector updates.

    Exporting from Chrome Sidebar

    The Prompteryx in Chrome sidebar agent also supports exporting actions to Visual Studio:

    1. Complete your task using the sidebar agent
    2. Click the "Visual Studio" button in the sidebar
    3. A new Visual Studio tab opens with your actions

    This is especially useful for "Current Tab" mode sessions where you've automated actions on a page you were already viewing.

    Next Steps

    Visual Studio Guide
    Learn how to edit, enhance, and run your exported workflows
    Video Recording
    Configure video quality and access your recordings