PrompteryxBeta
    ⌘K
    PlatformSupport
    Menu
    IntroductionInstall Desktop & extensionQuick StartPlatform Overview
    OverviewWhat you can makeAI Browser Agent in the chatModels and AutoConnectorsSchedulesProjectsExplore and publishingShare linksMemory and SkillsPersonal agent (beta)Welcome, settings and skinsPlans, credits and top-upsPrompteryx DesktopGroups (pilot)Phone app (early access)
    OverviewCreating WorkflowsTesting & DebuggingScheduling
    OverviewGetting StartedCommandsRecordingSettingsStructured OutputParallel AgentsTips & Best Practices
    OverviewInstallationSidebar AgentUsing Attached FilesExecute on Current TabExporting to Visual Studio
    Overview
    OverviewOpen PageClickClick CoordinatesFillExtract TextScreenshotWaitPress KeyFocus ElementBlur ElementSelect TextHighlight ElementSet ViewportGet Bounding BoxScrollHoverSelect OptionAssertionsCookiesEvaluate JavaScriptExample Workflows
    OverviewPrompteryx Browser AgentOpenAI
    OverviewSchedule TriggerWebhook Trigger
    OverviewGoogle SheetsGoogle CalendarConnect Hub (3,000+ apps)Example Workflows
    AI Vision SettingsChrome Automation ProfilesCloud BrowserBrowser Profiles & Persistent ContextVideo RecordingExecution LogsSharing & CollaborationEdit History
    Selectors GuideVariables
    Start hereGet an API keyRun the AI browser agentDrive a cloud browserRun workflows from anywhereUse connected apps (Connect Hub)SDK (TypeScript)CLIMCP for AI assistants
    REST APIWebhooksMCP toolsCloud Browser APICloud Browser quickstartMigrate from Browserbasen8nZapierMake.com

    Need help? Contact Support

    1. Documentation
    2. Nodes
    3. Data
    4. Filter

    Filter

    Data Node

    Let only the items that match a condition continue

    Overview

    The Filter Data node (in the Node Library's Flow Control tab) takes a list stored in a variable, keeps only the items that pass a condition, and saves the result in a new variable. Use it to skip empty rows or keep only high-priority records before you loop over them.

    Filter before you loop
    Point an "Apply to Each" loop at the filtered variable so the loop only runs for the items you care about. If a workflow contains the older Filter node (Field to Check / Condition / Compare Value), replace it with Filter Data or an If Condition — runs report that node as unsupported.
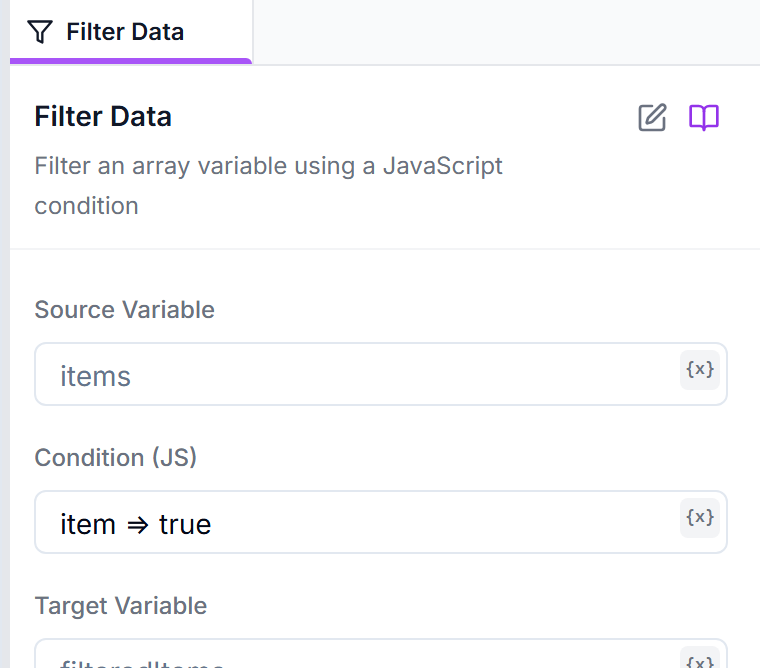
    The Filter Data node's config panel: source variable, JavaScript condition and target variable fields
    The Filter Data config panel — point it at an array variable and keep only the items that pass the condition.
    Parameters
    Configuration options for this node
    Source Variable
    Text Input
    Required

    The name of the variable that holds the list to filter — for example the output variable of an Extract Data node.

    Example: records
    Condition (JS)
    Text Input
    Required

    A JavaScript condition checked against each item. Write it as an arrow function or as an expression using item (and index). Items for which it is true are kept.

    Example: item => item.Email !== ''
    Target Variable
    Text Input
    Required

    The variable to store the filtered list in, so later steps can use it.

    Example: filteredItems

    Usage Example

    Only email rows that have an address
    Skip any row where the email is blank
    Source Variable: rows
    Condition (JS): item => item.Email && item.Email.trim() !== ''
    Target Variable: rowsWithEmail
    Loop over rowsWithEmail: rows with an email are kept; blank ones are dropped.

    Best Practices

    Tip: Filter early
    Filter the list before the loop so you don't waste steps (or credits) processing items you'll throw away anyway.
    Tip: Filter vs Switch
    Filter Data simply keeps or drops items. If you need to send items down several different paths instead, use the Switch node.

    Related Documentation

    If Condition

    Branch on a yes/no check

    Switch

    Route items down several paths

    Apply to Each

    Loop over a list of items

    Set Variable

    Store a value for later steps